When overlanding I have always wanted a quick and easy table to use, I also often need this with the work I do when I need to just pull out a laptop and program devices etc.
This is where the idea of the rear door table came from. I must admit most of mods and designs I have a pretty good idea of what I want to achieve before starting, but this was one of those projects which I literally just started one night and it turned out bloody well if you ask me.
I had some plywood lying in the garage which I had bought to build a rear drawer system, but I got cold feet on that idea. So when starting it was the choice of wood purely due to availability.
Step 1:
park the jimny in an ideal location. My rear work light really came in handy here..

Step 2:
I didn’t manage to get any images of this step, But I basically removed the stock rear plastic from the door and tranced it out onto my piece of plywood. It’s important to make sure the bottom curves match the stock one so that it does not interfere with the door seals.
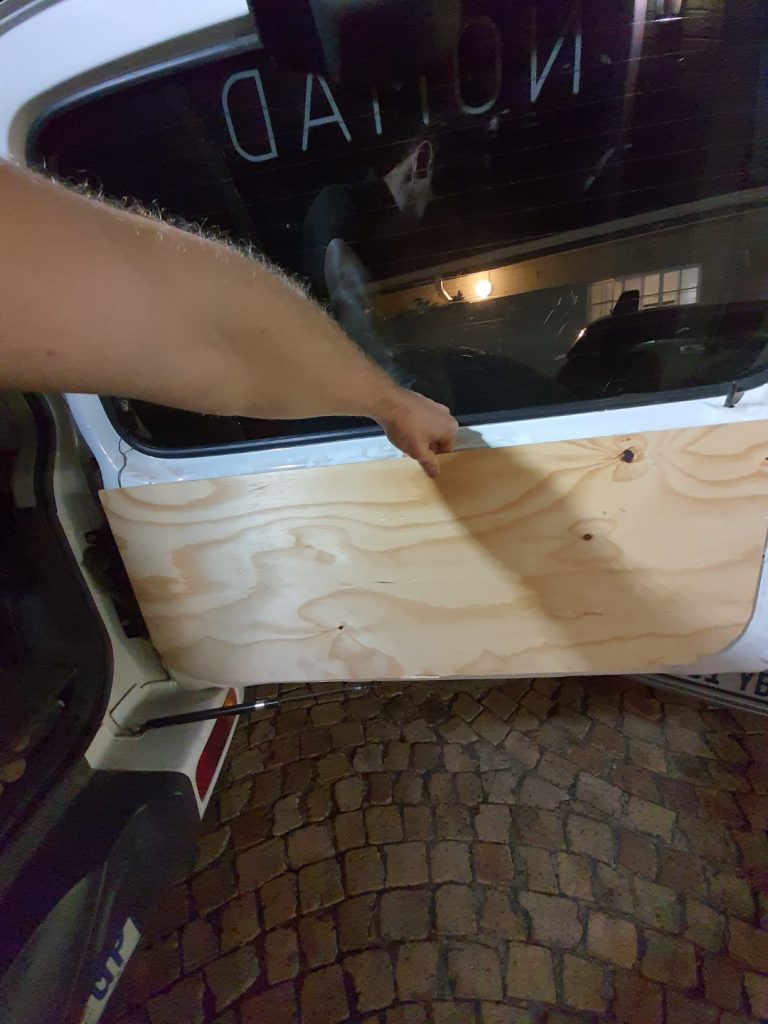
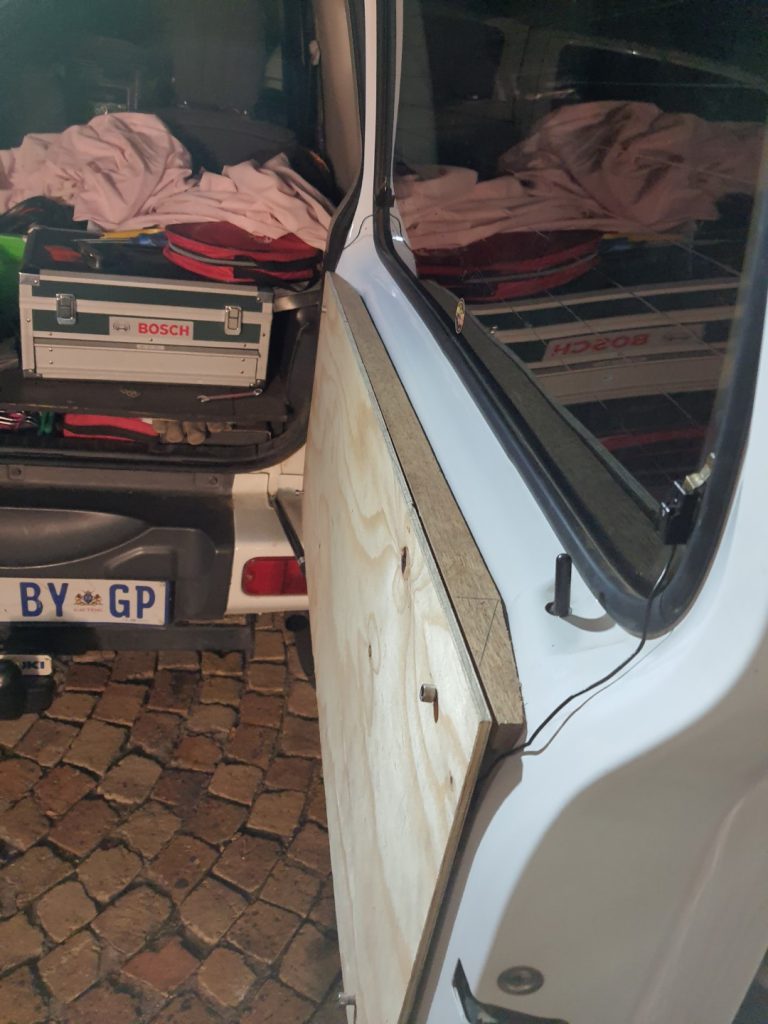
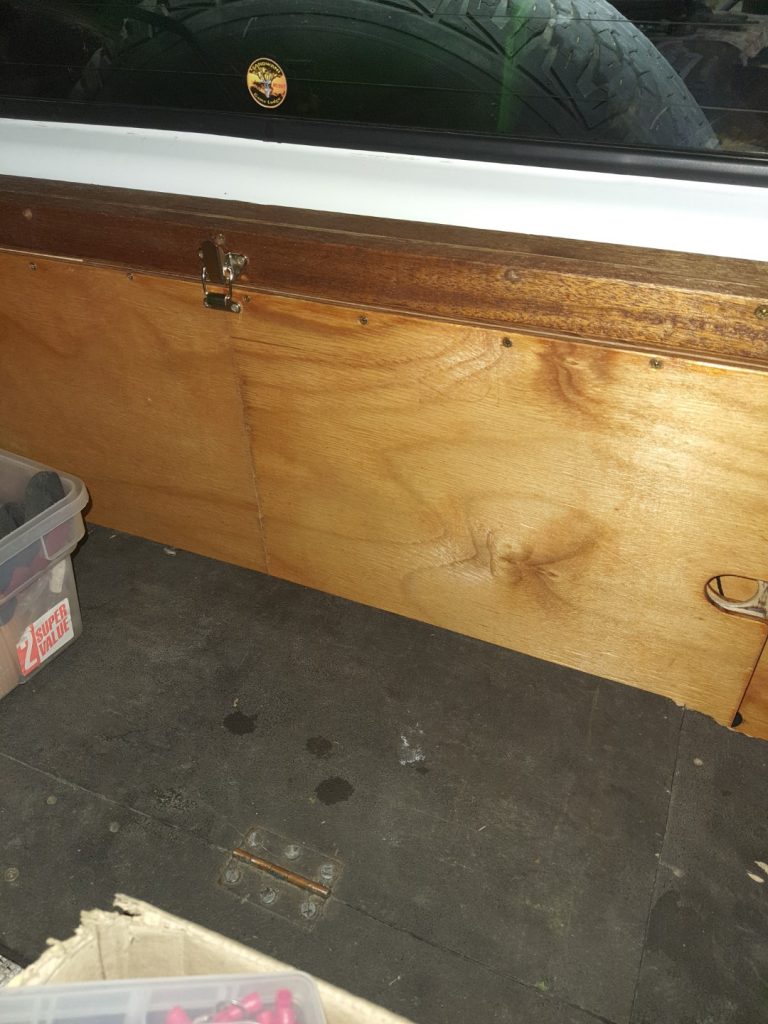
Now that we have our base piece lined up, We can start. As mentioned I was just winging it as I went. So the big issues with the Jimny back door is that it’s not a flat surface to mount to. So I decided to cut a nice piece of wood to fit on the top. This was multi-purpose. It filled the gap which was there, provided a lot of rigidity to the entire table piece, acts as a natural shelf to hold drinks etc while cooking on the table, and at the end, it also worked out to be a perfect place to put the latch which holds the door up?
Step 3:
Build a top support member.
This took some time as I had to trial and error the shame of the Jimny door. But just be patient and keep on sanding away until it fits..
Step 5
I use simple riv nuts and put them into the existing holes in the back door. I did have to drill some larger, so Just put some paint / sealant on those so that they do not rust in the near future. If you don’t have a proper riv nut machine this can be a real pain, I suggest borrowing one from a friend, I used the hold cap screw and some bolts but it was such a mission and they all kept spinning etc.
Step 6:
The actual table.
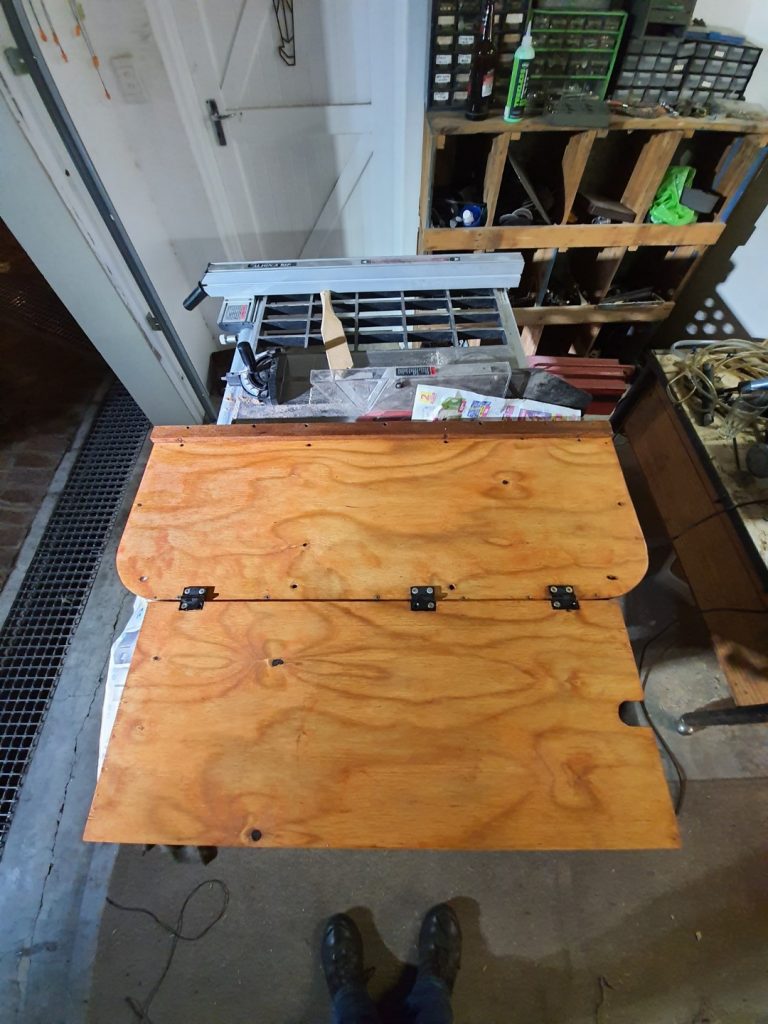
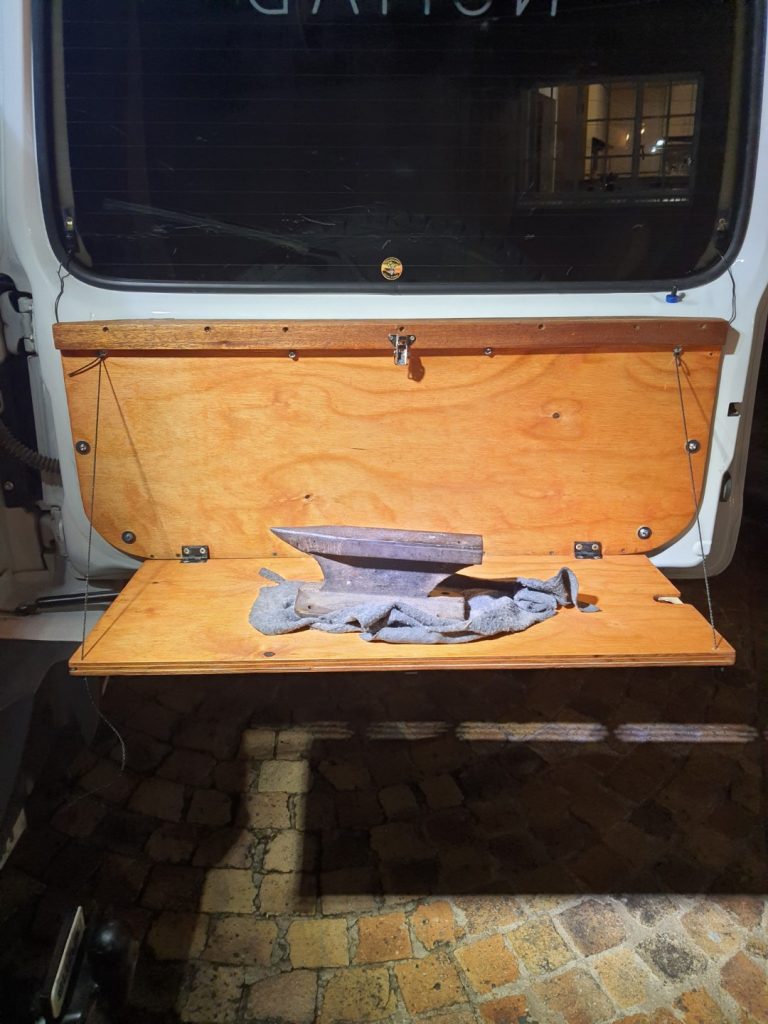
So here the biggest issue is the hinges and how the wood folds up on its self. I just had some small plastic hinges lying around in the workshop, and it somehow turned out perfectly.
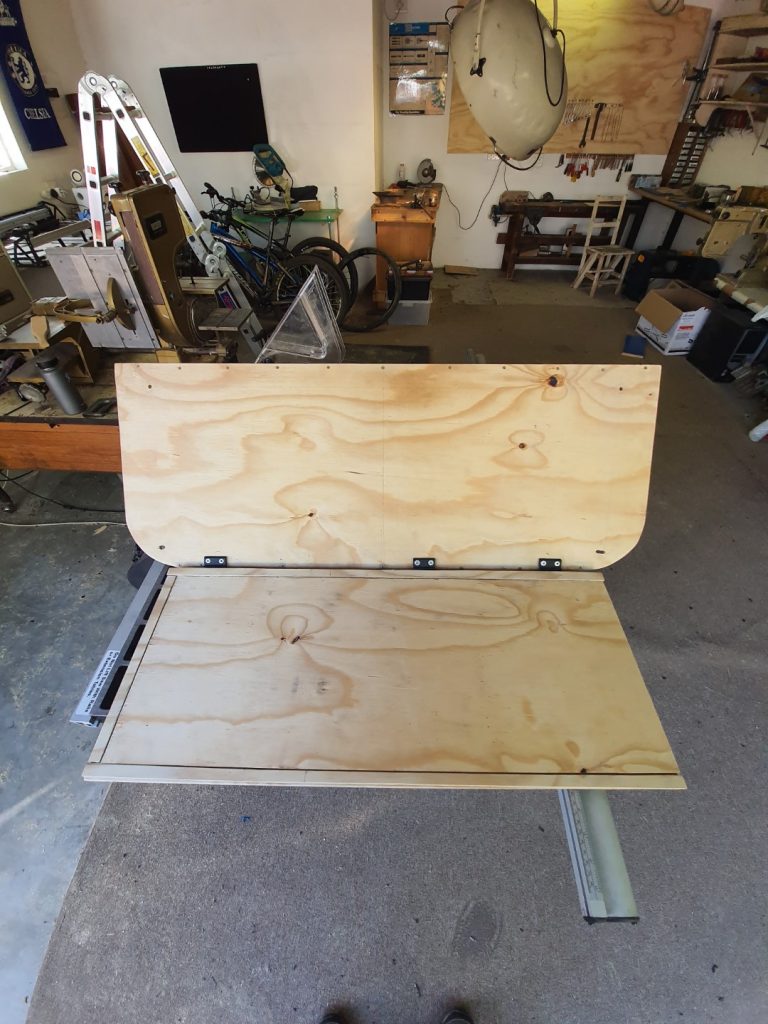
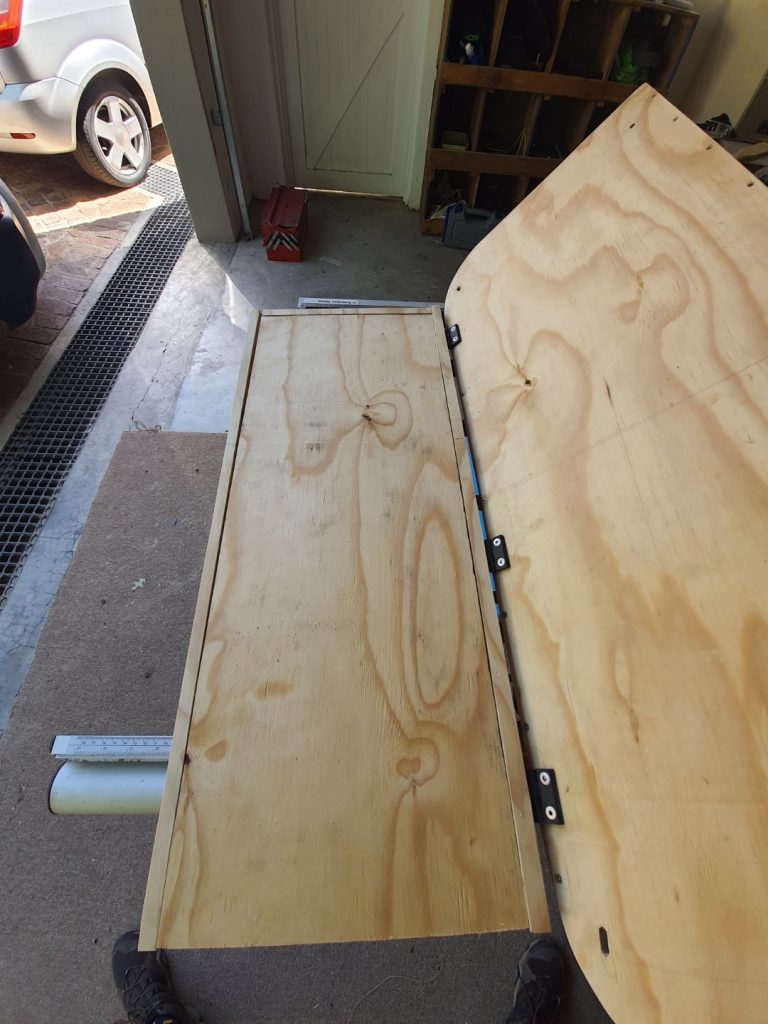
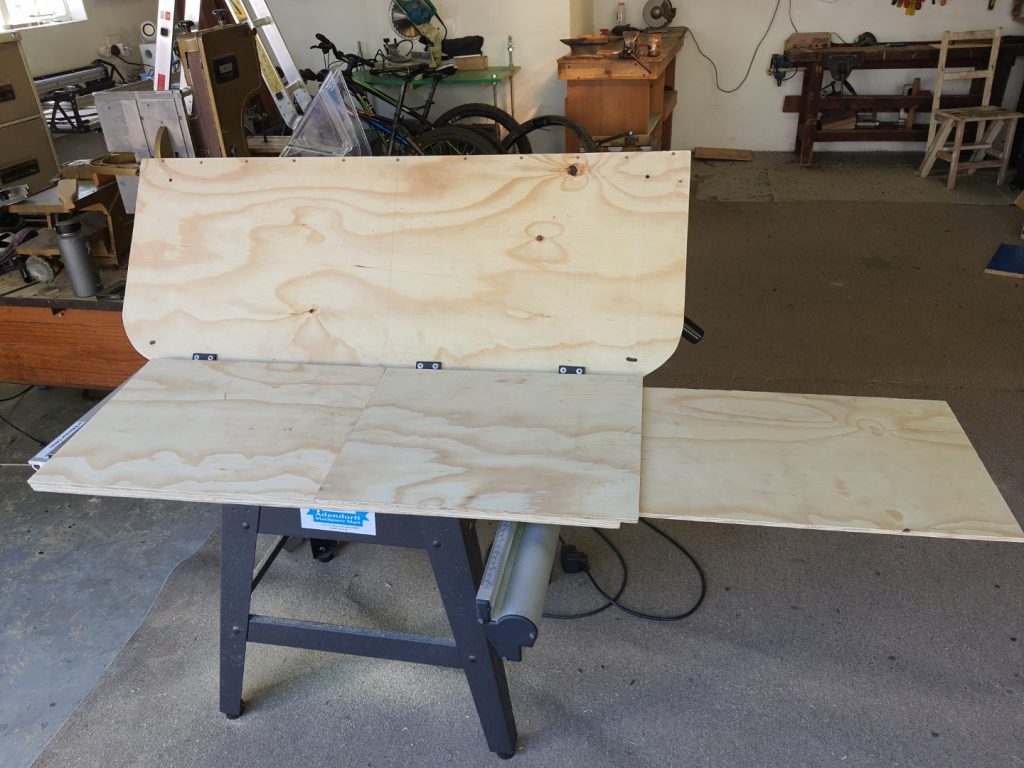

I also decided to heavily complicate my design and go with a 3-way sandwich of plywood where the middle layer would slide out as a table extender. This is probably not necessary and It adds a lot of complexity. I would recommend starting simple and you can always expand or improve it from there.
Step 7:
Test fitting and painting.
So before you jump into painting / varnishing the table, do a test fit and ensure that all cutting, sanding / drilling etc is done.
After varnishing 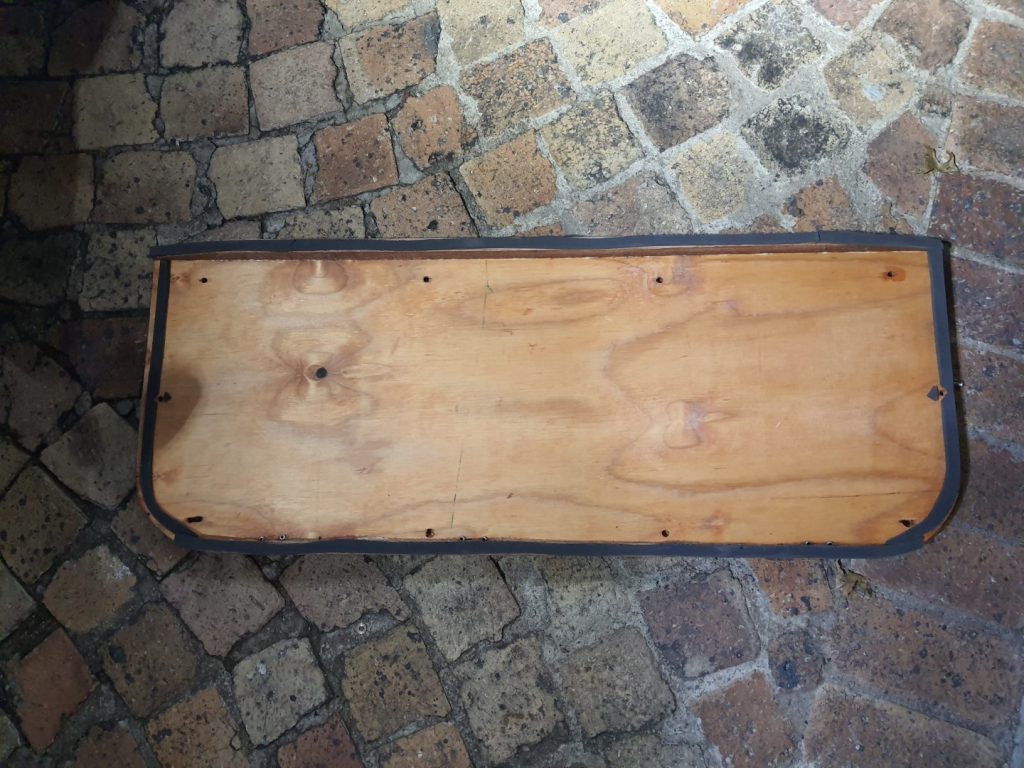
installing the rubber seal, this is to prevent any rattling. 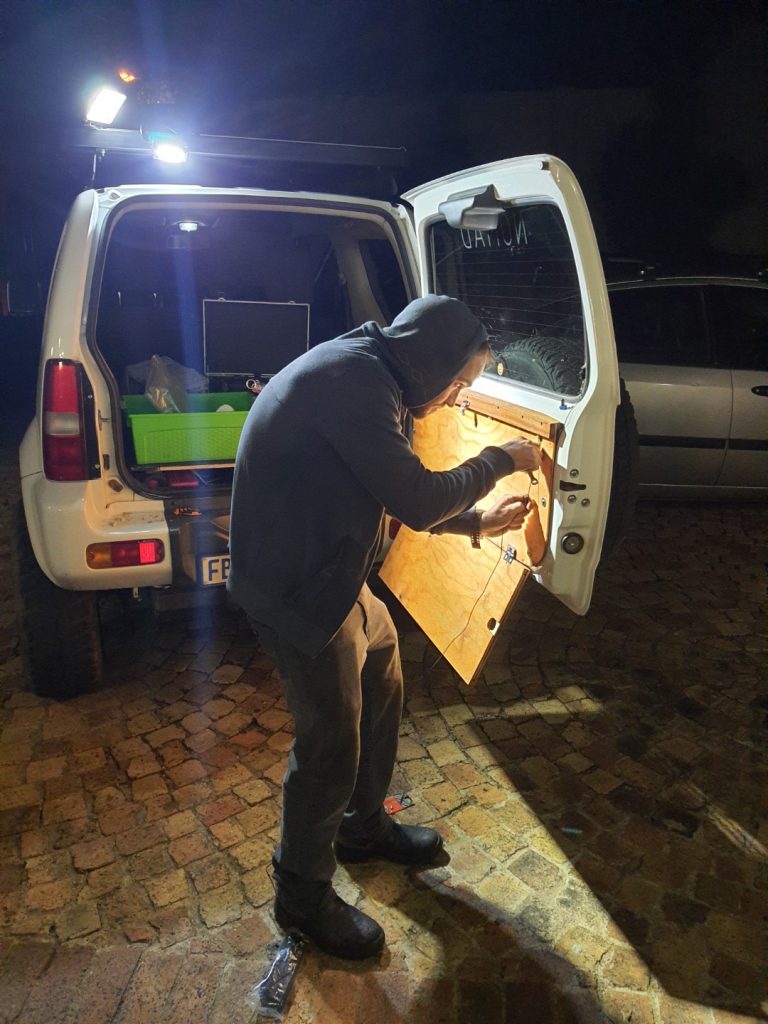
Test fitting the door.
Once you are happy hat the unit fits, go ahead and paint it in whatever you want, I went with an outdoor wood varnish (again was lying in the workshop), I really do not like the colour, but it is water-resistant and actually holds up pretty well to cutting and cooking etc. I have not had any issues to date.
A very important step is to check that the door can still close with your new table. Due to my complex 3 layer table, mine was quite thick, and it ended up touching my false floor. but that was an easy fix. I just cut it away 1cm.
Step 8:
Last step is to install the strings / cables etc. You can use pretty much anything here. I went with a thin nylon cable, was lying in the workshop and It didn’t have much stretch in it. It also wouldn’t rattle or anything like a small chain or metal cable. You could also use webbing or something similar.
Post Installation Feedback:
The next morning we left for our infamous DVR FALLS extreme Drakensberg trip. Which was a 4 day 4×4 & Overlanding trip. The table proved very handy and we used it daily for coffee, making sandwiches, unpacking stuff on the side of the road to get to a deeper box etc. It didn’t rattle at all which I was very surprised by. I guess I got lucky with my design…
I am super happy that I did this mod. It was not extremely expensive, You can pretty much control the costs by deciding what material to use use etc. I basically used everything that I had lying around. You do get ones that you can buy. But they will never fit perfectly and when you build you own one you can do what ever you want. I still want to install a usb and 230v power point on it so we can charge laptops and phone etc. But we will get there oine day.
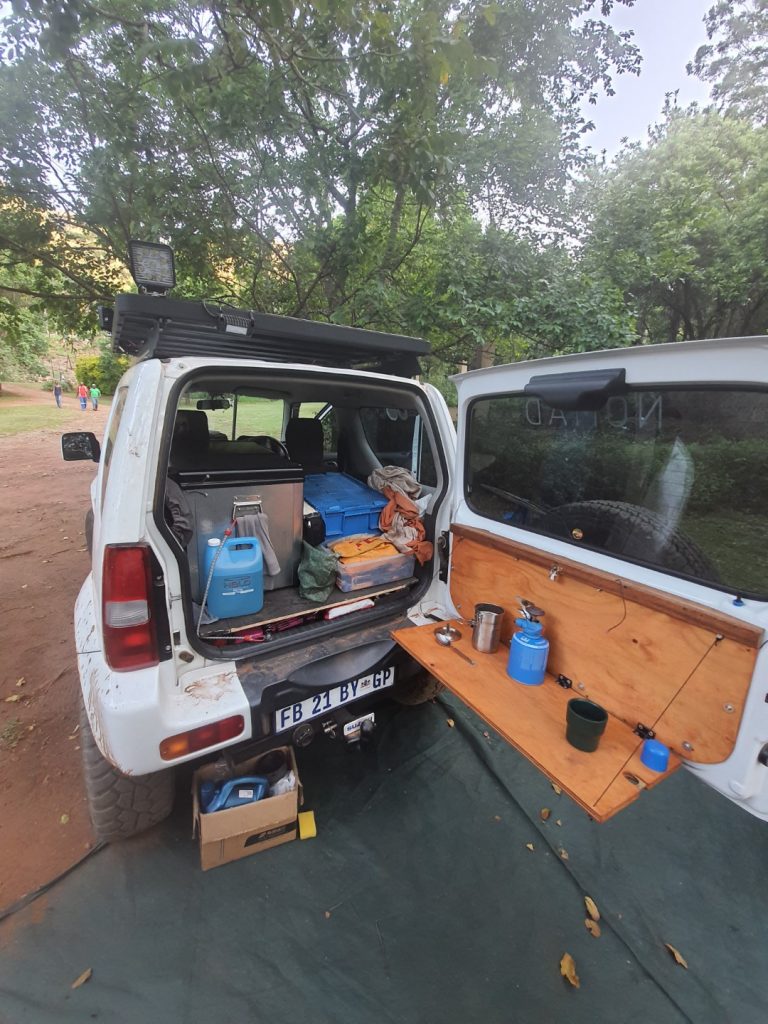
Morning coffe while camping 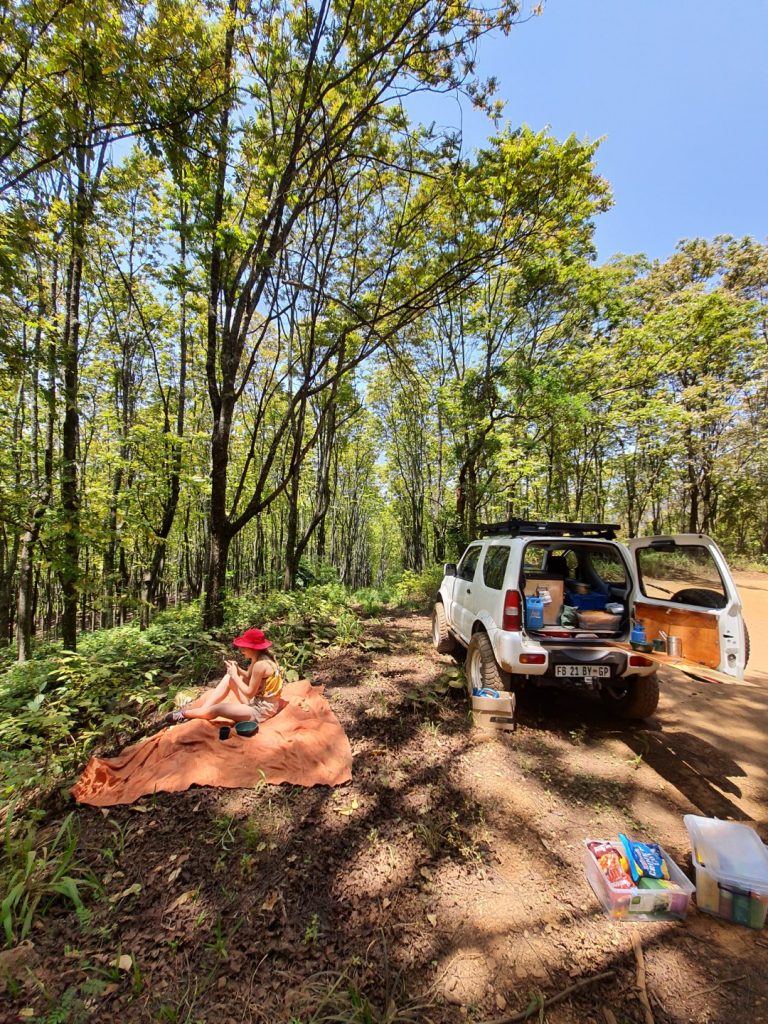
Roadside picnic lunches with the mrs. 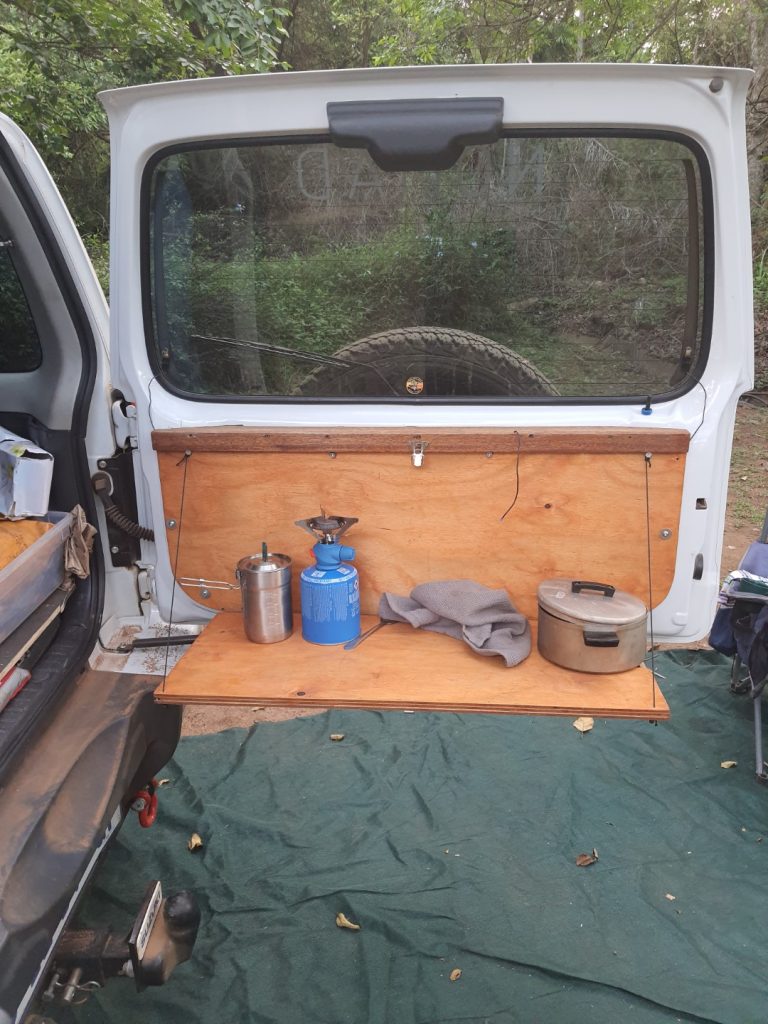
Cooking dinner at the campsite. This also really helps with the wind. 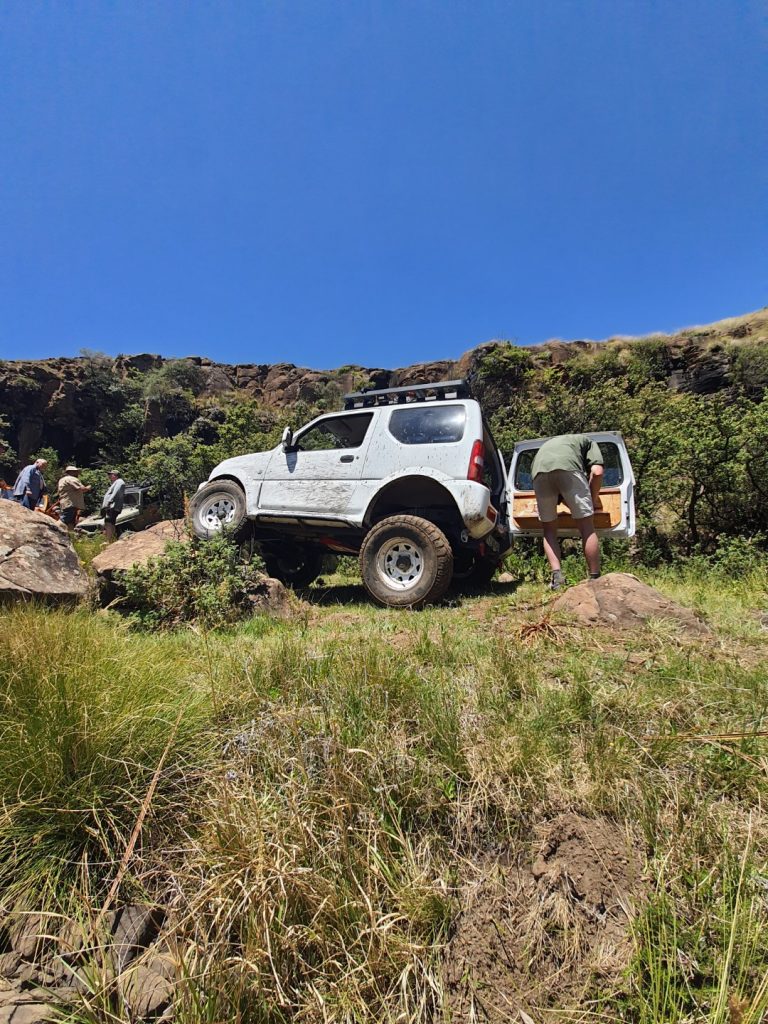
I thought it would be funny to lower the table for my really tall chef. You can’t miss a good flex opportunity. 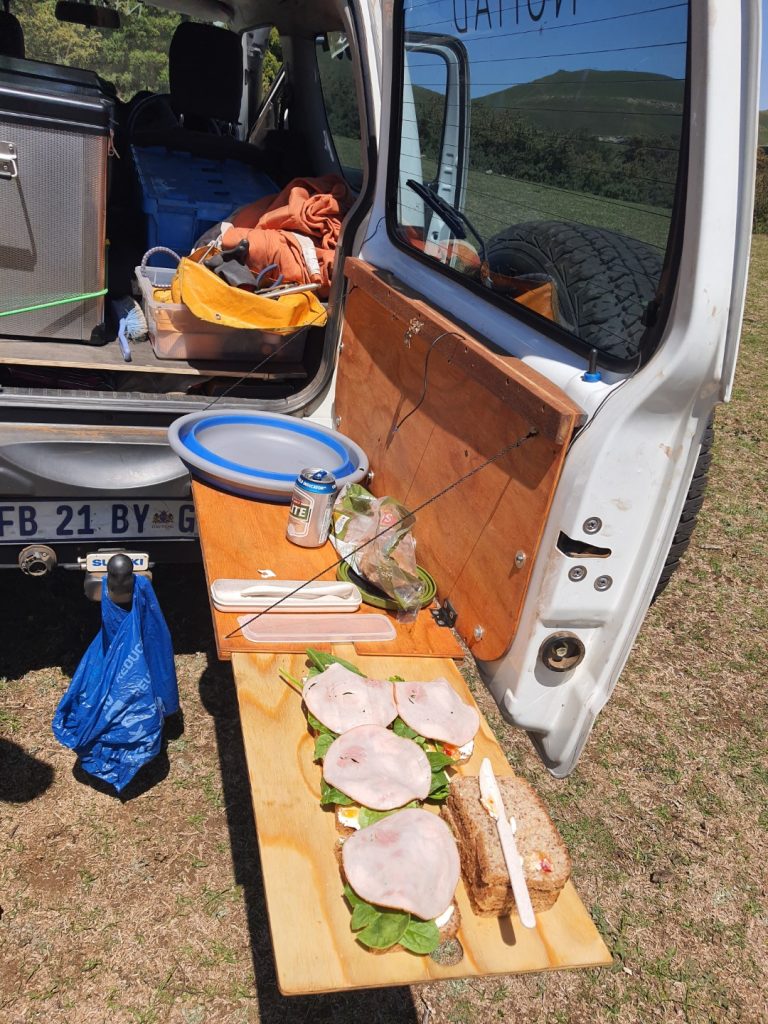
I have reserved the inner table for food/cutting board / clean surface. Its nice cause it can come fully out and be used to deliver the food.
I had a similar idea the other day. Got tired of it and just attached my table to the existing plastics… LOL. I did plan to finish it similar to your design but was just too lazy. I didn’t think of the inner table… I am now glad I got lazy because you have just sorted me out. Thank you. Love the deign man. Well done!